
DIY Spring Nail Art: Elegant Lilac & Silver Design Tutorial
With the arrival of spring, it's the perfect time to refresh your look with a chic and elegant nail design. The shimmering lilac hue complemented by a metallic accent captures the essence of the season beautifully. In this DIY tutorial, you'll learn how to create this sophisticated nail design from the comfort of your home. Let's elevate your nail art game with this simple yet stunning design!

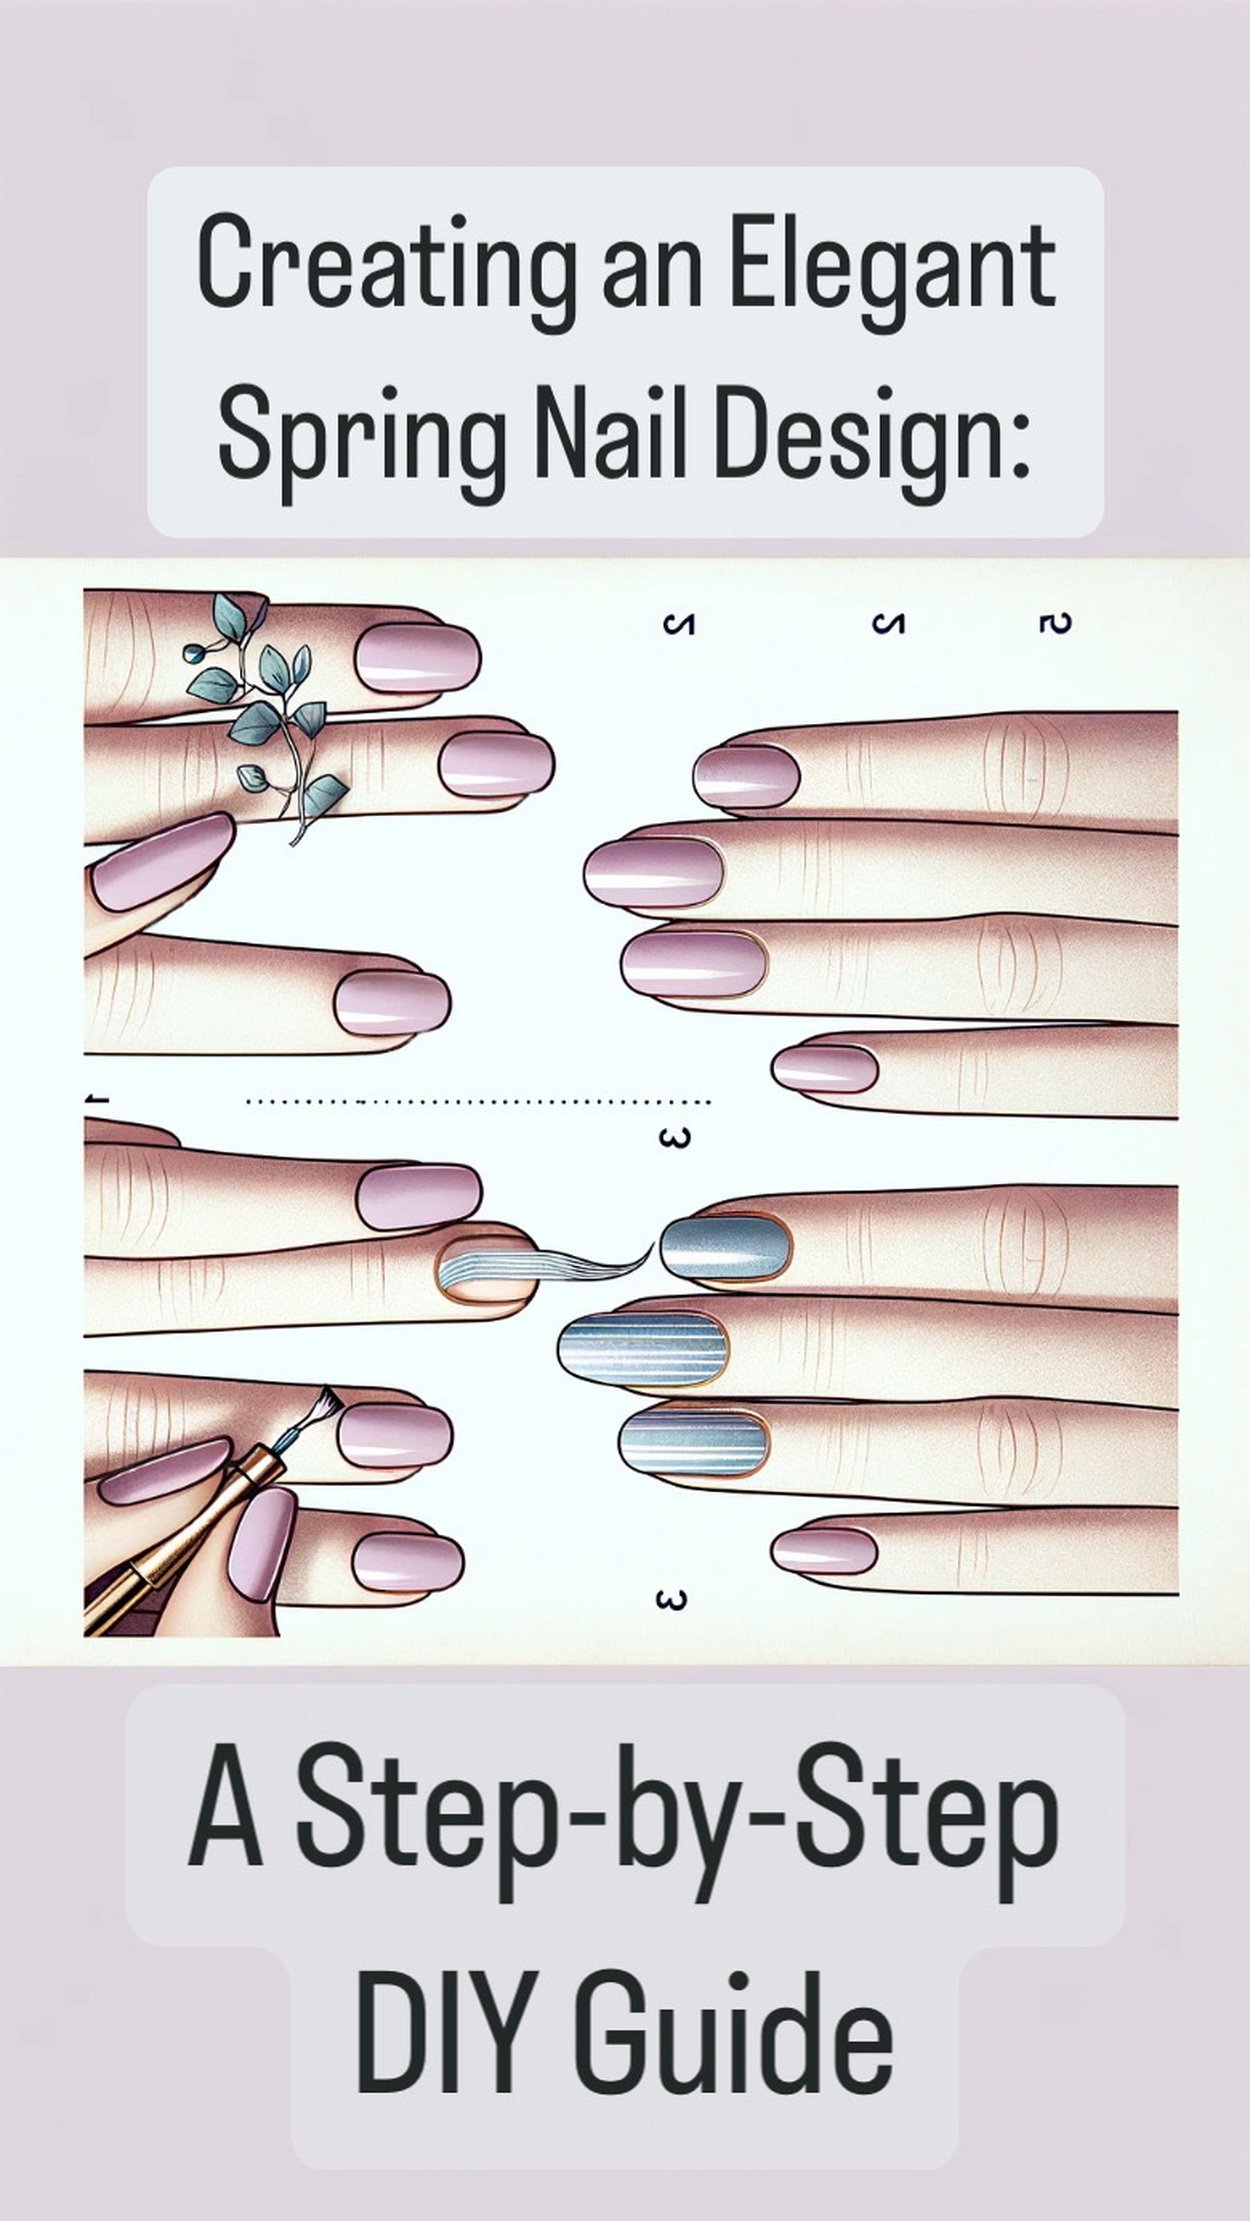
Creating an Elegant Spring Nail Design: A Step-by-Step DIY Guide
#nails #naildesign #springnails pic.twitter.com/8qo6TuFJIa
— Glam Artistry Hub (@glamartistryhub) March 30, 2024
Materials Needed
Lilac nail polish
Silver metallic nail polish
Top coat
Base coat
Nail file
Nail buffer
Fine-tipped nail art brush or toothpick
Nail polish remover
Cotton pads or swabs
Step-by-Step Guide
Prepare Your Nails
Start with clean, shaped nails. Use a nail file to shape your nails to the desired shape – almond-shaped works wonderfully for this design.
Gently buff the surface of your nails to ensure an even base, which helps in smoother polish application.
Apply Base Coat
Protect your nails and help your polish last longer by applying a clear base coat. Allow it to dry completely.
Paint with Lilac
Apply two thin coats of the lilac nail polish. Let each coat dry before applying the next to prevent smudging.
Add the Metallic Touch
Dip your fine-tipped brush or toothpick into the silver metallic polish.
Gently draw a thin line along one side of each nail, preferably the side that aligns with the edge of your fingertip.
If you have a steady hand, you can freehand a curved line starting from the nail bed to the tip, following the natural arch of your nails, for a more dynamic look.
Clean Up
Dip a cotton swab in nail polish remover to clean up any excess polish around the edges of your nails for a professional finish.
Seal with Top Coat
Once your masterpiece is dry, apply a clear top coat. This will add a glossy finish and prevent your design from chipping.
Conclusion
And there you have it – a chic and elegant spring nail design that’s perfect for any occasion. This DIY project is not just about looking fabulous but also about embracing the joy of creating beauty with your own hands. So, flaunt your nails and let them be a conversation starter this season. Remember, the key to great nail art is patience and practice. Enjoy your glamorous nails and the compliments they will surely attract!
Creating an Elegant Spring Nail Design: A Step-by-Step DIY Guide
As the gentle warmth of spring awakens the world around us, it’s the perfect time to refresh our style with an elegant spring nail design. This step-by-step DIY guide is crafted to help you infuse your nails with the season’s joy and sophistication. To enhance your experience and provide you with a wealth of creative ideas, we’ve compiled a list of sources, each linked by a keyword, to guide you on this artistic endeavor. Let these curated resources inspire you to create a nail design that captures the essence of spring’s renewal and elegance.
Elegant Spring Nail Design Sources:
May these sources be the wind beneath your wings as you soar into the realm of nail artistry. Embrace the season and let your nails tell a story of spring’s elegance and charm.


