
Achieving the Perfect Messy Bun: A Step-By-Step Guide
The messy bun is a timeless hairstyle that exudes a sense of effortless chic. It's versatile, easy to master, and can transition smoothly from a casual day look to an elegant evening style. Whether you're running errands, attending a virtual meeting, or going out with friends, this hairstyle can be your go-to choice for looking put together with minimal effort. Let's dive into the step-by-step process of creating this fashionable updo.
Achieving the Perfect Messy Bun: A Step-By-Step Guide
Messy bun hack Repost from @mariaaiellohair
— Glam Artistry Hub (@glamartistryhub) April 14, 2024
•
Messy Bun Hack🔥#messybun #springhair #easyhairstyles #hairtutorial https://t.co/2hiec1SOzj pic.twitter.com/K3fUc13lN8
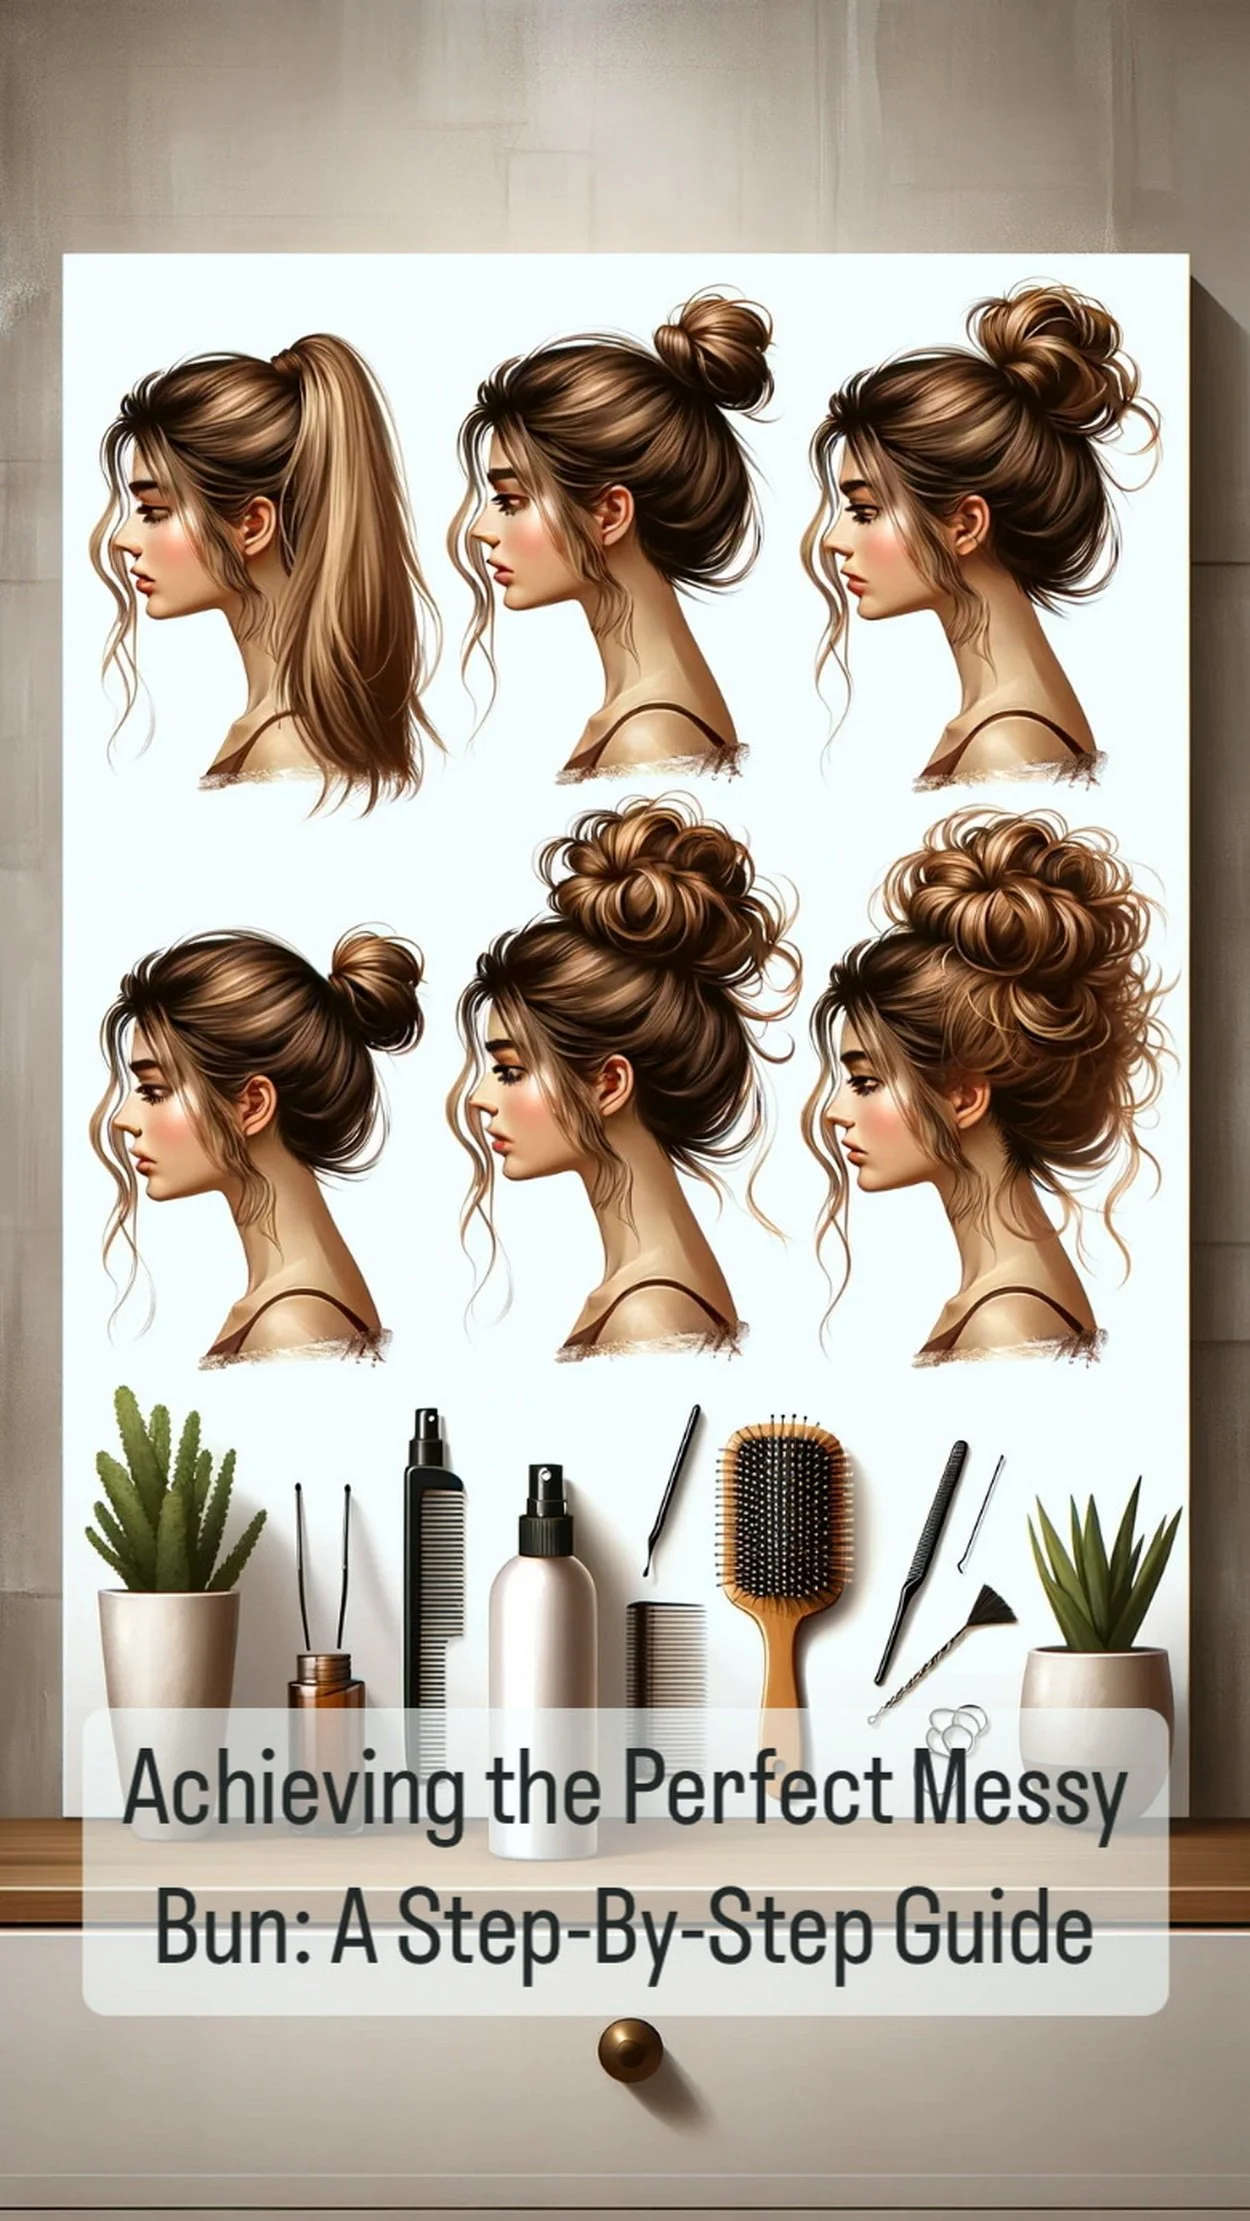
Step-By-Step Guide
1. Prep Your Hair
For the perfect messy bun, start with hair that's not freshly washed; the natural oils will give it better texture and hold. Lightly mist your hair with a texturizing spray to add grip and volume.
2. Create the Base
Gather your hair into a high ponytail at the crown of your head. Use a hair tie to secure it loosely. The height of the ponytail will determine the bun's placement, so adjust according to your preference.
3. Add Texture and Volume
Tease the ponytail with a fine-tooth comb to add volume. Gently pull out a few strands around your face to frame it and create that effortless, undone look.
4. Form the Bun
Twist the ponytail and then wrap it around the base. Don't worry about neatness; the charm of a messy bun lies in its imperfections. Secure the bun with bobby pins, tucking them underneath to conceal them.
5. Finishing Touches
Adjust the bun by pulling it gently to add fullness. Settle any stray hairs with more bobby pins or a light spritz of hairspray. For added flair, you can accessorize with a headband or a decorative hairpiece.
Product Recommendations
Texturizing Spray: A salt-infused spray for added texture.
Hairspray: A flexible-hold spray to set the style without stiffness.
Bobby Pins: Invest in pins that match your hair color for a seamless look.
Hair Ties: Look for snag-free bands to prevent breakage.
Fine-Tooth Comb: For teasing and smoothing out bumps.
Conclusion
The messy bun is a classic hairstyle that is all about embracing the beauty in imperfection. With these simple steps, you can achieve a look that's both stylish and practical. Remember, the key to a great messy bun is to not overthink it. The more natural and effortless it appears, the better it will look. Whether you’re a hair styling novice or a seasoned pro, this guide will help you create a beautiful messy bun every time.
Achieving the Perfect Messy Bun: A Step-By-Step Guide
et’s dive into the art of achieving the perfect messy bun. Whether you’re a seasoned bun enthusiast or a newbie, these quality blogs and websites will guide you toward effortless chicness. So, dear reader, fasten your hairpins and let’s elevate your bun game!
Mess(y) is the New Perfect: The Ultimate Guide to Effortless Chic Messy Buns:
This comprehensive guide by JuvaBun celebrates the messy bun revolution. It unravels the secrets of rocking the perfectly imperfect bun, regardless of your hair type. From understanding your hair’s unique needs to mastering the base and personalizing with braids or accessories, this blog has you covered. Ditch perfection, rock the mess with confidence! 🌺
How to Do a Messy Bun – The Perfect Messy Bun for Every Hair Type:
IPSY’s step-by-step guide caters to all hair textures—curly, straight, or wavy. Learn how to transform your locks into an easy, breezy messy bun. Because let’s face it, the best buns are the ones that look effortless and actually are! 🌟
How to Do a Messy Bun: Messy Bun Tutorial:
Want to jazz up your everyday messy bun? Makeup.com has you covered with three fun tutorials that work for various hair types. Get ready to embrace the art of controlled chaos!
Remember, the messy bun isn’t just a hairstyle; it’s a state of mind. So go forth, embrace the imperfections, and let your bun radiate effortless coolness! 🙌🏼💕


