
Unlocking the Hidden Arsenal: Women’s Top Secret Life Hacks Revealed
Have you ever found yourself in a pinch, wishing for a magic wand to simplify your daily beauty and personal care routines? Imagine possessing a secret arsenal of tricks that make life not just easier, but more delightful. In the bustling world we navigate, where time is gold and convenience is king, there lies a treasure trove of ingenious hacks—guarded whispers among women, passed down through generations or discovered in moments of sheer creativity. These aren't just any tips; they're life-altering secrets that transform everyday frustrations into moments of triumph. From turning a chaotic morning into a breeze to mastering the art of looking effortlessly chic on a dime, the power of knowledge we're about to unveil is nothing short of magical. Whether you're a seasoned hack enthusiast or new to the game of life's little shortcuts, prepare to be enlightened with ten women's hacks so clever, they almost feel like cheating. Welcome to the world where every woman is an alchemist in her own right, turning the mundane into the extraordinary with a few simple tricks up her sleeve. Let's dive into this hidden diary of secrets, shall we?
Bobby Pin as an Emergency Zipper Pull: If a zipper pull breaks, a bobby pin can serve as an immediate replacement, allowing for easy zipping.
Bobby Pin as an Emergency Zipper Pull

The Zipper Dilemma
We’ve all been there—the dreaded moment when a zipper pull decides to call it quits. Maybe it’s your favorite pair of jeans, a backpack, or even a winter coat. Suddenly, the zipper refuses to budge, leaving you in a bind. But fear not! Enter the humble bobby pin.
Why Bobby Pins?
Bobby pins are cheap, lightweight, and easy to carry around. You probably have a stash of them in your bathroom drawer or scattered around your room. These little hairpins are more than just hair accessories—they’re versatile problem solvers.
How to Use a Bobby Pin as an Emergency Zipper Pull
Assess the Situation:
When your zipper pull breaks, take a deep breath. You’ve got this!
Inspect the zipper slider. If it’s missing or detached, you’re in need of a quick fix.
Grab a Bobby Pin:
Find a bobby pin (or two) from your collection.
Choose one with a flat end (the side without the grooves).
Thread the Bobby Pin Through the Zipper Hole:
Slide the flat end of the bobby pin through the hole where the original zipper pull used to be.
Make sure it catches securely.
Zip Up or Down:
Hold the bobby pin like a makeshift zipper pull.
Gently pull up or down to zip or unzip your garment.
Voilà!:
Your zipper is back in action, thanks to the trusty bobby pin.
You can now continue your day without any wardrobe malfunctions.
References:
Conclusion
Next time you’re faced with a zipper emergency, remember that a bobby pin can be your secret weapon. Keep a few tucked away in your bag or pocket—you never know when they’ll save the day!
Have you ever used a bobby pin in an unconventional way? Share your hacks in the comments below! 📌💡
Behind-the-Scenes: Women’s Clever Life Hacks
Using a Pantyliner to Absorb Sweat: Attaching a pantyliner to the inside of a shirt can prevent sweat stains on hot days or during nervous situations.

The Sweat Dilemma
We’ve all been there—those moments when the heat is relentless, or anxiety kicks in, and suddenly our shirts become battlefields for unsightly sweat stains. But fear not! Enter the trusty pantyliner.
Why Pantyliners?
Pantyliners are thin, absorbent, and discreet. They’re designed for personal hygiene, but their versatility extends beyond that. Let’s explore how they can save the day when it comes to sweat management.
How to Use a Pantyliner as a Sweat Absorber
Choose Your Pantyliner:
Grab a clean pantyliner from your stash.
Opt for a thin one to ensure comfort and invisibility.
Position It Inside Your Shirt:
Peel off the backing to reveal the adhesive side.
Stick the pantyliner to the inside of your shirt, near the underarm area.
Make sure it’s secure but not visible from the outside.
Stay Fresh and Dry:
The pantyliner will absorb excess sweat throughout the day.
Say goodbye to those dreaded underarm stains!
References:
Panty Liner Hacks For Everyday Use That Will Surprise You | LittleThings.com
6 summer beauty hacks: Toothbrush to fight frizz, panty liners… - TODAY
Hairspray to Remove Static Cling: A quick spritz of hairspray on the inside of skirts or dresses can eliminate static cling, keeping the fabric from sticking to legs.
Hairspray to Remove Static Cling

The Static Cling Struggle
Static cling—those annoying moments when your skirt or dress seems magnetically attracted to your legs. It’s uncomfortable, embarrassing, and can ruin a perfectly good outfit. But fear not! Hairspray to the rescue.
Why Hairspray?
Hairspray isn’t just for taming flyaways; it’s also a secret weapon against static electricity. Its alcohol content and light mist make it perfect for combating clingy fabrics.
How to Use Hairspray for Static Cling
Choose Your Hairspray:
Grab any can of hairspray you have on hand.
Opt for a light-hold formula—no need for industrial-strength lacquer!
Spritz the Inside of Your Skirt or Dress:
Stand about 1–2 feet away from your clothing.
Give the inside of your garment a quick spritz with the hairspray.
Focus on areas prone to static cling, like the lining or where fabric touches your skin.
Let It Dry:
Allow the hairspray to dry for a few seconds.
It creates an invisible anti-static barrier.
Put On Your Outfit:
Slip into your skirt or dress without worrying about cling.
The hairspray will keep the fabric from sticking to your legs.
References:
Get Rid of Static Cling in a Pinch With Hand Lotion or Hairspray | Lifehacker
How to Get Rid of Static Cling: 10+ Easy Solutions - wikiHow
Conclusion
Next time static cling threatens to ruin your day, reach for that trusty hairspray. Stay confident, comfortable, and cling-free! 💨👗
Girl’s Top Secrets No Man Should Know
Freezing Tights to Prevent Runs: Before wearing new tights for the first time, running them under water, wringing them out, and freezing them overnight can strengthen the fibers, making them less prone to runs.
Freezing Tights to Prevent Runs
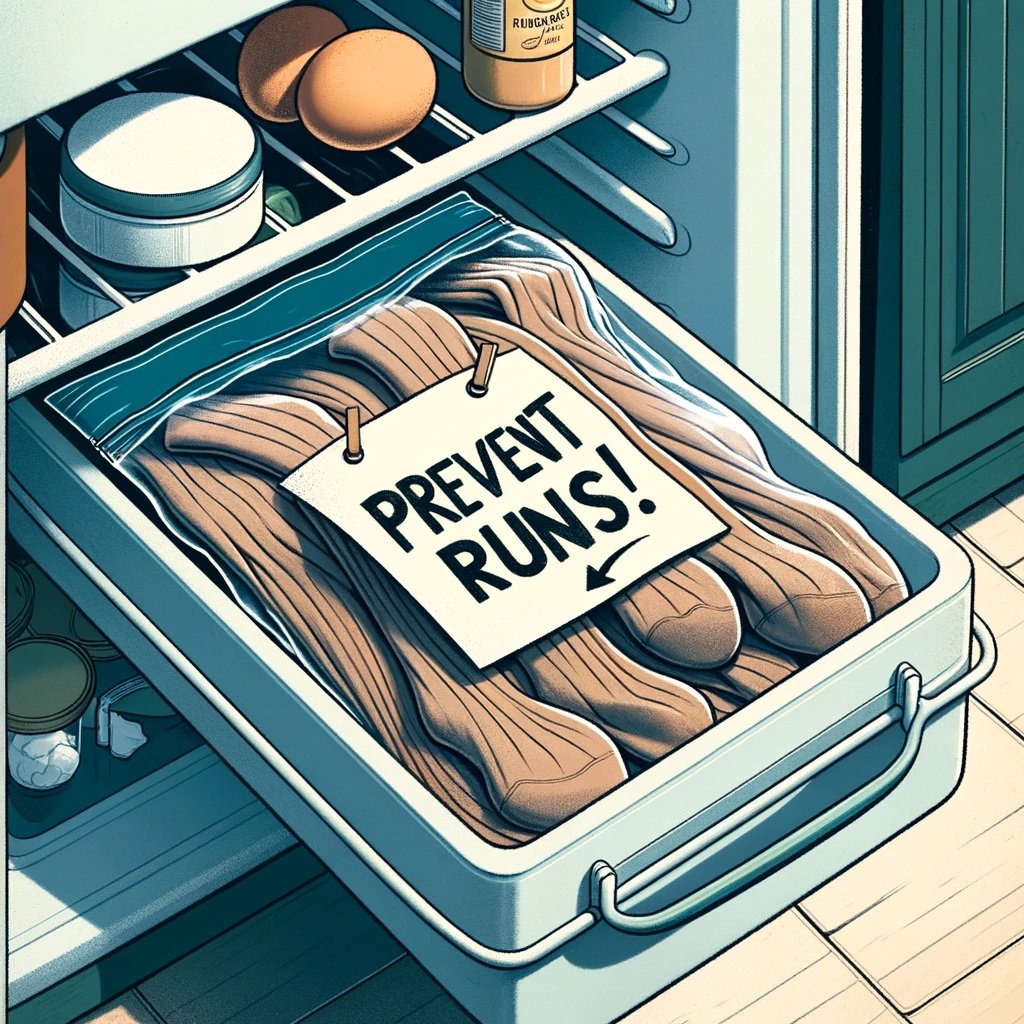
The Tights Dilemma
Tights are a wardrobe staple, especially during colder months. However, they’re notorious for developing runs and snags. But fear not! Your freezer can be your secret weapon.
Why Freeze Tights?
Freezing tights might sound unconventional, but it’s surprisingly effective. The cold temperature helps strengthen the fibers, making them more resistant to runs and tears.
How to Freeze Tights for Durability
Prepare Your New Tights:
Before wearing your new tights, run them under water until they’re damp.
Gently wring out any excess water.
Freeze Overnight:
Place the damp tights in a plastic bag.
Pop them in the freezer overnight.
Thaw and Wear:
Take the tights out in the morning and let them thaw at room temperature.
Once dry, they’re ready to wear.
References:
Conclusion
Next time you buy a fresh pair of tights, give them a chilly treatment. Your frozen tights will thank you by staying run-free and durable! ❄️👗
Heel Caps to Protect Stilettos: Using heel caps or protectors can prevent high heels from sinking into the grass during outdoor events and protect the heels from damage.
Heel Caps to Protect Stilettos

The Stiletto Dilemma
Stilettos are elegant and chic, but their slender heels can be a challenge, especially outdoors. Ever experienced the frustration of sinking into grass or damaging your heels on rough terrain? Fear not! Heel caps are here to save the day.
Why Heel Caps?
Heel caps (also known as heel protectors) serve multiple purposes:
Preventing Sinking: They widen the base of your heel, distributing your weight more evenly and preventing those dreaded grass sinkholes.
Damage Control: Heel caps shield your heels from scratches, nicks, and wear caused by contact with hard surfaces.
How to Use Heel Caps for Stilettos
Choose the Right Size:
Measure the width of your heel where it meets the top lift (the part touching the ground).
Select heel caps that match your heel width.
Attach the Heel Caps:
Slip the heel caps onto your stilettos.
Ensure they fit snugly and cover the entire heel tip.
Walk Confidently:
With heel caps in place, you’re ready to conquer any surface.
Say goodbye to sinking heels and scuffed stilettos!
References:
Conclusion
Next time you slip into your favorite stilettos, don’t forget their trusty companions—heel caps. Now you can strut confidently, even on grassy lawns! 🌿👠
Silicone Sponge as a Foundation Applicator: A silicone sponge can be used to apply foundation, as it doesn't absorb the product like traditional sponges or brushes, saving makeup and money.
Silicone Sponges: The Ultimate Foundation Applicators

Introduction
Silicone sponges have disrupted the beauty industry, challenging the status quo of traditional makeup tools. As a makeup enthusiast, you’ll want to know how these clear, squishy sponges can revolutionize your foundation routine. Let’s delve into the details!
What Is a Silicone Beauty Sponge?
A silicone beauty sponge is a reusable makeup applicator made entirely of silicone. Here’s what you need to know:
Material: Silicone is durable, heat-resistant, and environmentally friendly.
Shape Variety: Silicone sponges come in various shapes—teardrop, oval, round, and more.
Purpose: Designed specifically for liquid makeup application (not suitable for powders).
How to Use a Silicone Beauty Sponge
Mastering the art of silicone sponge application is straightforward. Follow these steps:
Apply Liquid Foundation: Start by dispensing a small amount of liquid foundation onto the sponge. Remember, less is more! Apply in small increments to ensure seamless blending.
Blend in Circular Motions: Swipe the sponge across your face in circular motions. The non-absorbent silicone ensures even coverage without wasting product.
Gradual Coverage: Add foundation gradually, blending as you go. Dewy formulas work best with silicone sponges.
Experiment: Once comfortable, explore other liquid products—concealers, blushes, or highlighters.
Silicone Sponge vs. Traditional Makeup Sponge
Let’s compare:
Silicone Sponges:
Pros: Zero product absorption, easy to clean, eco-friendly.
Cons: May require practice, ideal for liquid formulas.
Traditional Makeup Sponges:
Pros: Versatile, great for blending, available in various shapes.
Cons: Absorb product, need frequent replacement.
References
Conclusion
Embrace the silicone sponge revolution! It’s not just about flawless makeup—it’s about sustainability and smart choices. Let your beauty routine be both efficient and eco-conscious. 🌟
Turning a Bra Into a Racerback: For tops where straps are visible, a paper clip can pull bra straps together in the back to convert it into a racerback style, keeping straps hidden.
Turning a Bra Into a Racerback: The Paper Clip Hack

Why Racerback?
Racerback tops and dresses are stylish and comfortable, but they often reveal bra straps. Instead of buying a separate racerback bra, let’s transform your existing bra effortlessly.
The Paper Clip Method
Materials Needed:
A regular bra with adjustable straps.
A paper clip (yes, you read that right!).
Steps:
Put on your bra.
Take a paper clip and uncoil it slightly.
Slide the paper clip under the bra straps at the back, right below your shoulder blades.
Pull the straps together, forming a V shape.
Secure the straps by twisting the paper clip or creating a small loop.
Voilà! You’ve just converted your bra into a racerback style.
Benefits of the Paper Clip Hack
Cost-Effective: No need to buy a new bra; use what you already have.
Travel-Friendly: Perfect for trips when you want to pack light.
Temporary Solution: Easily reversible—remove the paper clip when not needed.
Other Alternatives
Bra Clips: Similar to the paper clip method, bra clips are designed specifically for this purpose. They’re more durable and come in various colors.
Elastic Bands: Attach an elastic band between the bra straps to achieve the racerback effect.
References:
Remember, fashion is all about creativity and making the most of what you have. Happy styling! 🌟
Cornstarch as a Makeup Setter: In a pinch, cornstarch can be used as a translucent powder to set makeup, absorbing excess oil without adding color.
Cornstarch as a Makeup Setter: The Oil-Absorbing Miracle

Introduction
Cornstarch, that unassuming powder tucked away in your pantry, has hidden talents beyond thickening sauces. When it comes to makeup, it can step up as a translucent setting powder, helping you achieve a flawless finish without breaking the bank. Let’s dive into the details!
Why Cornstarch?
Absorbency: Cornstarch is insanely absorbent, making it ideal for controlling excess oil.
Cost-Effective: It’s ridiculously cheap—just a few dollars per pound.
Gentle: Cornstarch is gentle on the skin and won’t cause irritation.
Creative Uses for Cornstarch in Your Beauty Routine
Dry Shampoo:
No time to shampoo? Dust cornstarch onto your roots using a makeup brush.
Focus on areas around your part and hairline.
For dark hair, mix cornstarch with cocoa powder to match your color.
Cleansing Powder:
Cornstarch’s fine texture is perfect for gentle exfoliation.
Slightly dampen your face and hands, then massage cornstarch in circular motions.
Rinse off and follow with your usual cleanser.
Nail Polish Mattifier:
Add cornstarch to your clear topcoat for a matte finish.
Swirl it in the topcoat and paint it onto your nails after applying color.
Lipstick Mattifier:
Transform any shiny lipstick into a matte one.
Apply lipstick, pat on cornstarch with your finger, and repeat for a long-lasting matte look.
Face Powder:
Dust cornstarch to set makeup and absorb oil throughout the day.
Easy, effective, and budget-friendly.
Deodorant:
Skip chemical-laden deodorants.
Sprinkle a bit of cornstarch in your hand and rub it into your underarms.
Mix it with unrefined coconut oil for a solid deodorant.
Scented Body Powder:
Create your own scented body powder for hot summer days.
Add essential oil to cornstarch in a small jar and shake well.
References:
Remember, beauty doesn’t have to be expensive. Grab that cornstarch from your kitchen and let it work its magic! 🌟
Toothbrush for Flyaways: Spraying a clean toothbrush with hairspray and gently brushing it over flyaways can tame them without affecting the rest of the hairstyle.
Toothbrush for Flyaways: The Hairspray Trick

Why Use a Toothbrush?
Flyaway hairs can be a nuisance, especially when you’ve put effort into creating a polished look. Fear not! Grab a clean toothbrush and follow this simple technique.
The Hairspray Method
Materials Needed:
A clean toothbrush (preferably an old one).
Hairspray (choose one with a strong hold).
Steps:
Spray the bristles of the toothbrush with hairspray.
Gently brush down any flyaways, coaxing them back into place.
The closely spaced bristles act like a mini boar bristle brush, smoothing out those unruly strands.
Blend the flyaways seamlessly with the rest of your hair.
Benefits of Using a Toothbrush
Precision: The small size of a toothbrush allows you to target specific areas.
Control: You won’t accidentally disturb the rest of your hairstyle.
Travel-Friendly: Pop a toothbrush and a travel-sized hairspray in your bag for on-the-go touch-ups.
References:
Remember, beauty hacks are all about creativity and making the most of everyday items. Say goodbye to flyaways and hello to a sleek, polished look! 🌟
Eyeshadow to Cover Up Roots: In between hair coloring appointments, a matching eyeshadow can be applied to the roots to help camouflage any regrowth.
Eyeshadow to Conceal Roots: A Quick Guide

1. Choose the Right Eyeshadow Shade
Select a matte eyeshadow that closely matches your hair color. Ideally, it should be the same shade or slightly darker.
Avoid shimmery or glittery eyeshadows, as they won’t blend seamlessly with your hair.
2. Prep Your Hair
Blot any excess oil or moisture from the roots using a tissue or oil blotting paper. This step helps the eyeshadow adhere better and stay in place.
3. Application Technique
Use an eyeshadow brush (or even a clean makeup brush) to apply the eyeshadow.
Dab the brush into the eyeshadow powder, ensuring you pick up enough product.
Gently apply the eyeshadow to the visible roots along your part and hairline.
If you have any bald spots, apply the eyeshadow there as well. It can create the illusion of thicker hair.
4. Blending and Building Coverage
Lightly brush and blend the eyeshadow into your roots. Work it in until the gray or regrowth starts to fade.
Reapply as needed throughout the day or whenever you notice roots peeking through.
5. Temporary Solution
Remember that this method is a temporary fix. It won’t last as long as professional hair dye.
Use it when you’re in a hurry or want to look polished for an event.
Bonus Tip: Brow Powder
If you don’t have matte eyeshadow, you can also use brow powder in a similar shade. Brow powders are designed to mimic natural hair color and adhere well.
Final Thoughts
Eyeshadow root touch-ups are great for emergencies, but for a more lasting solution, schedule regular appointments with your colorist.
Until then, embrace the power of makeup to keep your roots under wraps!
Remember, this technique won’t replace a proper salon visit, but it’s a handy trick to keep in your beauty arsenal. Happy camouflaging! 🌟👁️🗨️
From Pantyliners to Bra Straps: Women’s Stealthy Solutions
11 Girl’s Secrets and Hacks Guys Don’t Know About
40 Girls Secrets No Man Should Know
As we’ve delved into the world of women’s life hacks, we’ve uncovered ingenious solutions that often remain shrouded in mystery. These hacks aren’t just about convenience; they’re about empowerment, resourcefulness, and the art of making everyday life smoother.
And now, dear readers, armed with these clandestine hacks, you’re part of an exclusive club—one that thrives on creativity, adaptability, and a touch of magic. Share these secrets, experiment, and let them enhance your daily routines.
Remember, life hacks transcend gender. So, gentlemen, if you’re reading this, consider it an invitation to explore the uncharted territory of women’s wisdom. And ladies, keep those secrets close—because empowerment lies in sharing knowledge.
Thank you for joining us on this journey through the hidden corridors of practical brilliance. Until next time, may your bobby pins never fail, your pantyliners stay discreet, and your heels conquer any terrain!
🌟✨ Keep hacking, keep thriving! ✨🌟


