DIY Chrome Butterfly Nail Art Tutorial
Welcome to the dazzling world of nail art, where creativity meets elegance! Today, we’re going to embark on a colorful journey to achieve a mesmerizing Chrome Butterfly look for your nails. This DIY tutorial is designed for fashion enthusiasts who love to add a touch of whimsy to their style. Whether you’re prepping for a special occasion or just want to brighten up your day-to-day look, this guide will help you flutter into the spotlight with your very own butterfly-inspired nails. So grab your nail polishes, and let’s spread our wings into this artistic adventure!

DIY Chrome Butterfly Nail Art Tutorial
Chrome Butterfly #nails #nailart https://t.co/zGFyampKv1 pic.twitter.com/DcaO4IW5Xw
— Glam Artistry Hub (@glamartistryhub) March 30, 2024
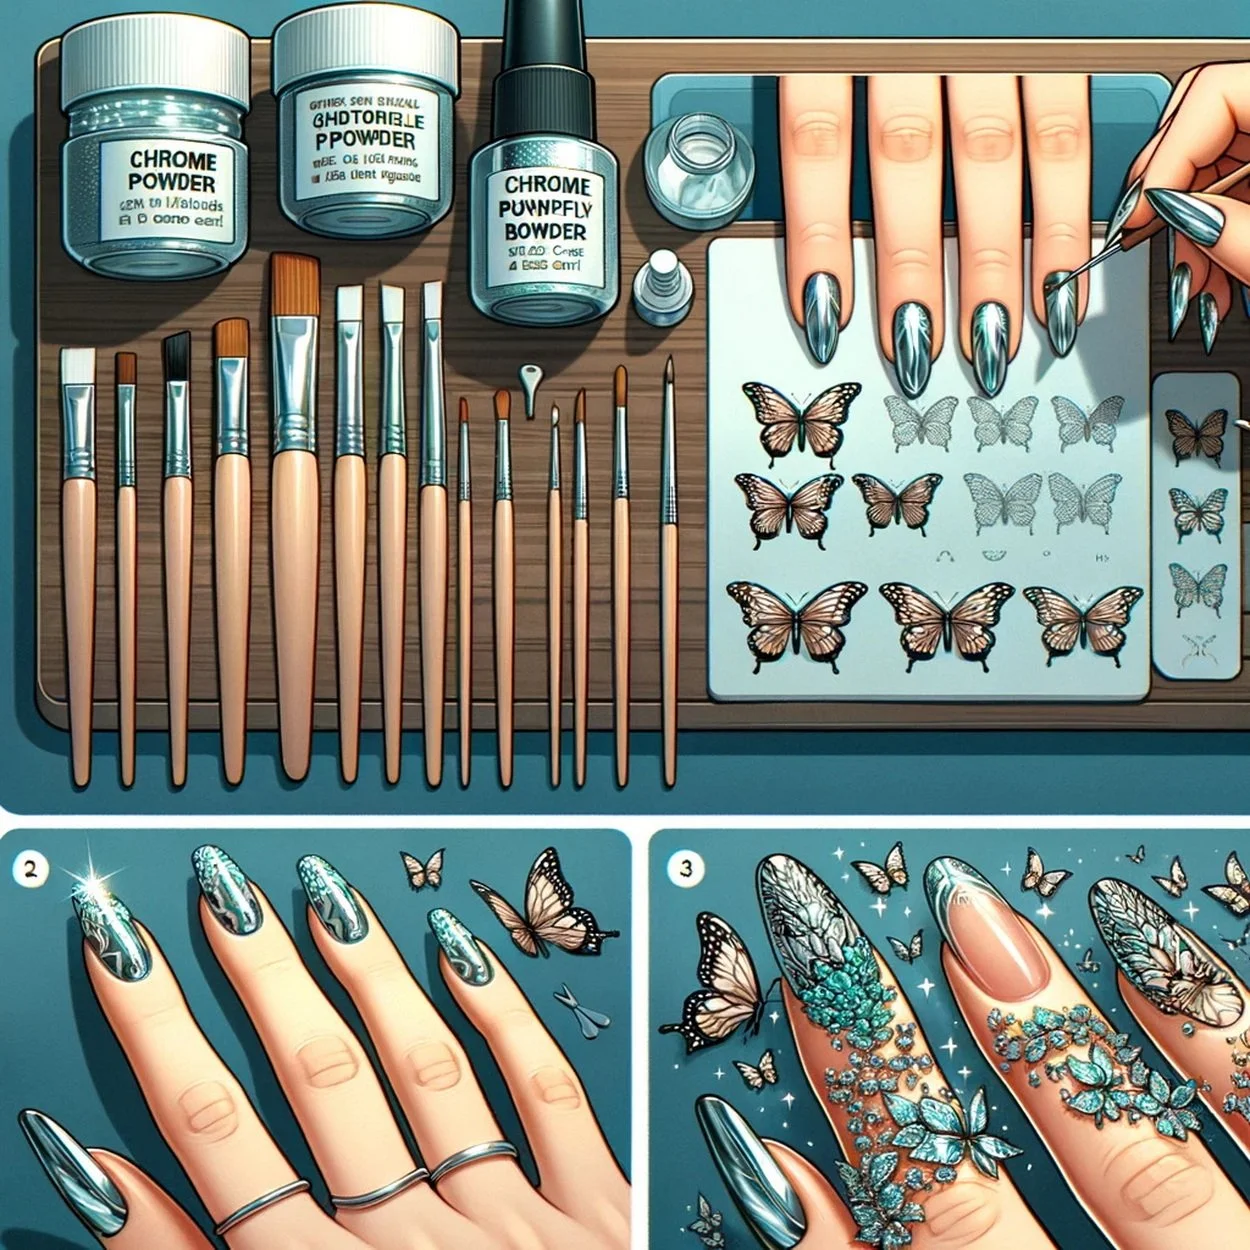
Materials Needed:
Base Coat: To protect your natural nails.
Chrome Nail Powder: For that metallic, reflective finish.
Black Nail Polish: For the butterfly outlines.
Orange and Yellow Nail Polishes: To create the butterfly wings.
Fine Nail Art Brush: For precise details.
Top Coat: To seal and protect your design.
Step-by-Step Guide:
Prep Your Nails:
Start with clean, dry nails.
Apply a base coat to protect your natural nails.
Apply Black Polish:
Paint your nails with black nail polish as the base color.
Let it dry completely.
Create Butterfly Wings:
Using a fine nail art brush, draw the butterfly wings with orange and yellow nail polish.
The wings should resemble the intricate patterns of a butterfly.
Be creative and add details like dots or lines to mimic the texture of butterfly wings.
Add Chrome Powder:
Apply a no-wipe gel top coat on one nail at a time.
While it’s still tacky, gently rub the chrome nail powder onto the nail using an applicator or sponge.
Buff the powder until it shines like a mirror.
Repeat this step for all nails.
Outline the Butterflies:
Use black nail polish and a fine brush to outline the butterfly wings.
Add details like veins and markings.
Seal with Top Coat:
Apply a glossy top coat to seal your design and give it a smooth finish.
Make sure to cover the entire nail, including the chrome powder.
Recommended Nail Products:
Chrome Nail Powder: You can find various shades of chrome powder online or at beauty supply stores. Look for one that gives a mirror-like effect.
Black Nail Polish: Any good-quality black nail polish will work.
Orange and Yellow Nail Polishes: Choose vibrant shades to create eye-catching butterfly wings.
Fine Nail Art Brush: Invest in a fine brush for precise details.
Top Coat: Opt for a no-wipe gel top coat for a long-lasting finish.
Remember to let each layer dry thoroughly before moving on to the next step. Once your nails are complete, you’ll have a gorgeous chrome butterfly manicure! 🦋✨
Feel free to explore these products online:
Enjoy creating your beautiful butterfly nails! 🌟

DIY Chrome Butterfly Nail Art Tutorial
As you embark on your journey to create the stunning Chrome Butterfly nail art, we’ve compiled a comprehensive list of resources to enrich your experience. These resources will provide you with additional insights, tips, and inspiration to enhance your DIY nail art skills. Whether you’re a beginner or an experienced nail artist, these resources are sure to add value to your creative process.
Acrylic Nails Guide: Learn how to apply acrylic nails with a step-by-step guide for beginners.
Nail Blog Ideas: Explore a variety of nail supplies and guidance for your nail art projects.
Easy Nail Art Tutorials: Check out popular nail art tutorials and ideas suitable for beginners.
These resources will guide you through different techniques and styles, helping you to master the art of nail design. Remember, practice makes perfect, and with these resources at your fingertips, you’re well on your way to becoming a nail art aficionado. Enjoy the process and let your creativity shine!


